Older Blog entries
|

Fran Sneesby lives in S.E. Queensland building multihulls for Yendys Multihulls. |
| 1 May 2015
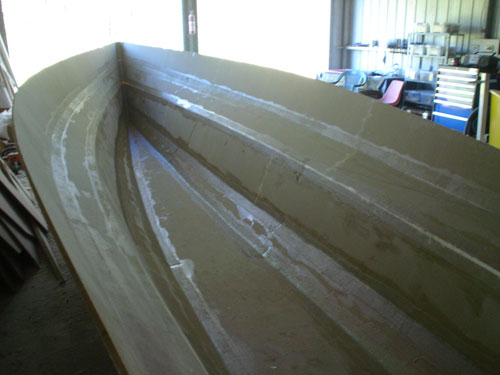
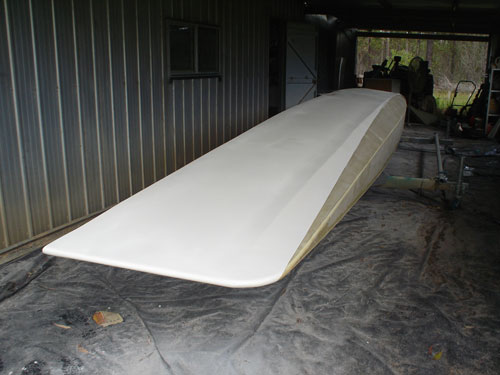
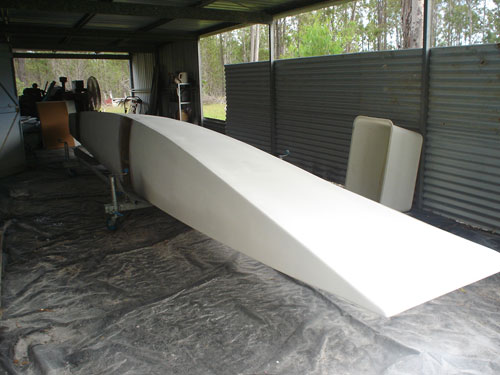
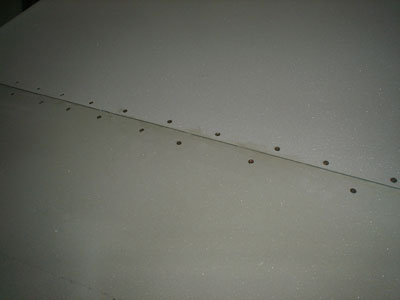
The Scarab 650 main hull was turned right way up and the chines taped on the inside. Ray built a purpose built trolley so the
boat can be easily moved around the shed. It works like a beauty.
The Scarab 650 was moved to another area leaving space to finish some other projects. Now I can clean out the shed. It hasn't
been washed out for for ages. We are usually too busy to stop and clean. The boat bits belong to two small 12 trimarans that are all ready
to paint. Waiting for the rain to go away. We should be flooded in again for a while.

|
|
12 Jan 2015
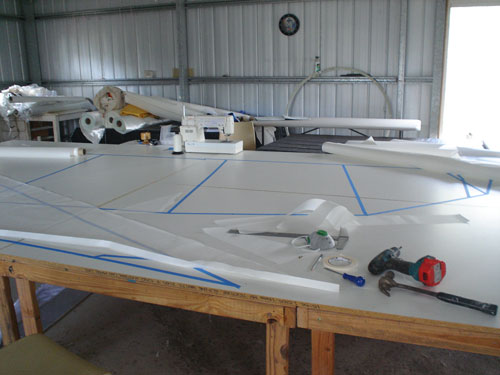
Its so good to be back in the shed. I built a table last year to make sails for some small trimarans we are building.
It's a large table perfect space to laminate the panels for the bulkheads for Rays Scarab 32.
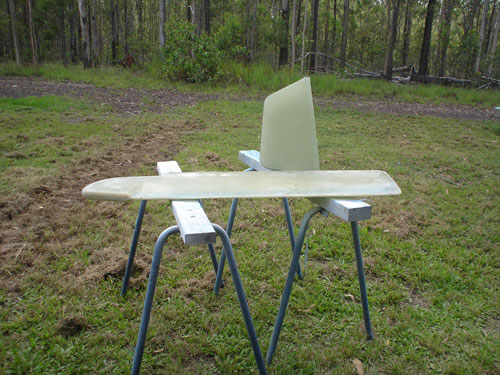
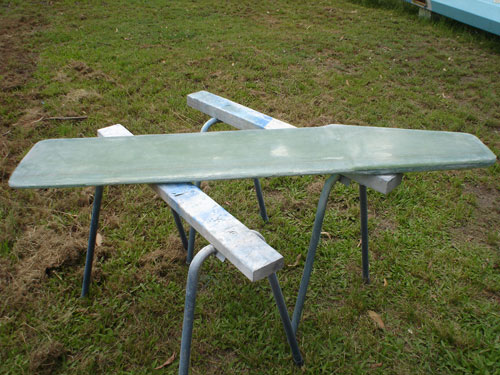
While waiting for the supplies needed to make the panels I finished a few small jobs on the Scarab 650. Finished off the rudder
blade and rudder head as well as the centreboard. They are all moulded as this was a quicker way to make 4 of each for other boats
we are building.
|
| 1 Jan 2015
Its been a long time since I wrote anything here. It had been about 10 years since I stopped working on our partly finished
house. It is reasonably comfortable but maybe not up to the rest of my familys standard. Ceilings and walls didnt seem
important when measured against building another boat and playing in the shed.
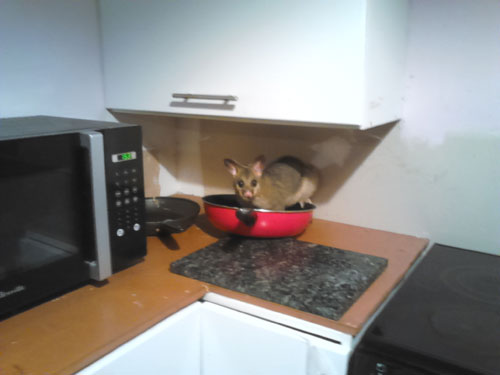
About 3 months ago we reached a limit with sharing the house with miscellaneous wild life. For 3 nights we were visited by a
young possum who wanted to play throughout the night. He came through the partly finished ceiling and galloped around the
house helping him-self to any food that was available. It was the final straw when he took a chunk out of Rays ankle because
he wouldnt give him any food. The incident with the possum, as well as removing pythons from the house every week or so, made it
a good idea to seal up the house and keep it for ourselves. So Ive concentrated on the house for 3 months. Now its time to go
back to the shed. Ill be glad to be back on the boat but I am enjoying a creature free house as well as a beautiful kitchen
and bathroom.
|
| 20 May 2014
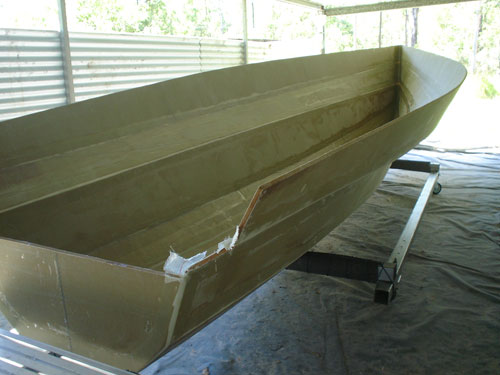
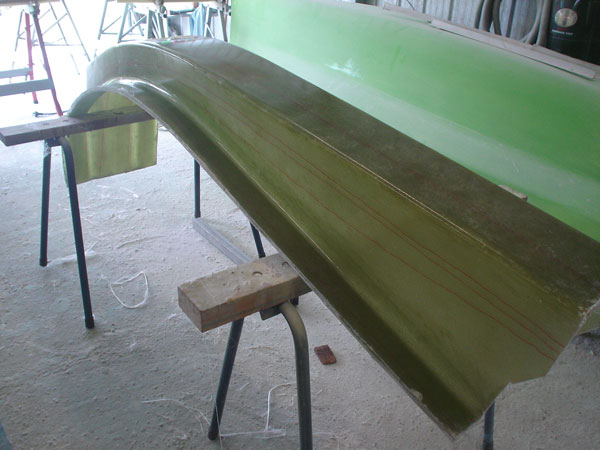
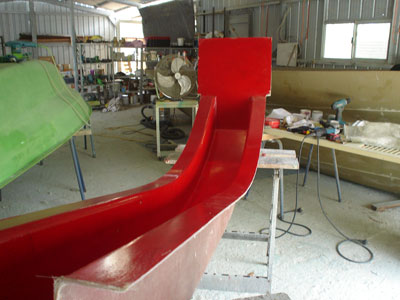
Many jobs are almost completed. The floats for Ray's Scarab 32 are filled and primed ready for the beams to be attached and
the whole thing painted. Also completed are 3 rudder blades a centreboard and the keel for Ray's boat. All the rudders, centreboard were all moulded which is why there does not seem to be much happening. Having a very lazy day today
away from the resin.
|
| 28 February 2014
It's been very hot for this time of the year and no rain at all. Having a little trouble with the resin going off too quickly but
it's been a productive time. One Scarab 650 beam out of the mould and the ring frames finished. Also working on making moulded rudders
and centreboards.
|
| 2 February 2014
It's been a whole year since I had anything to say. It's been really busy around here. Working on many boats so it seems that
nothing is happening. Back to working on the Scarab 650 whenever I can. All the other beams we have built were made using a plywood
or form-ply female mould. This time I wanted a more robust mould so used a male plug and made a female fibreglass mould. This should
stand up to making more than the initial 4 beams I need for this boat.
|
|
20 February 2013
Its raining again. We are flooded in for the second time this year. It makes for a quiet time, good for contemplation. Its not
a good time to apply resin so its a time to sit back and think instead of rushing out into the shed.
Since my last blog I have been doing different jobs on many boats so consequently I feel nothing has really been accomplished.
The floats for the Scarab 650 are finished awaiting filling and paint. Now I have switched to the Scarab 32 which is taking up
all the space in the shed so I have to stay on this project until its finished before I can return to my boat.
At the moment I am filling, fairing and painting the floats for the Scarab 32. The beams are ready to install and paint. The boat
is too large to turn often so I am priming one side at a time. Once the bottom of the float hull is primed then the beams will
be joined in the deck faired and primed and then the whole float with the beams attached will be sprayed in one go.
The bottom of the float will have anti-fouling below the water-line. The boat will be built using polyester resin. Because Ray
wants to use Copper Coat anti-fouling we will be coating the bottom 3 panels with epoxy resin before marking out the water-line
for the anti-fouling coat. While I am finishing the floats Ray is in the shed next door working on the main hull. But his shed
is flooded at the moment so he is contemplating too.
|
10 November 2012
It's been a long time since I've try to write anything. All the panels and beams for Ray's 32 footer are finished and I have
been side-tracked into working on a 12' moulded tri. This entailed more work than I anticipated. The Scarab 650 is progressing
well with the floats well on the way. I did stop for a while and rewarded us with a new kitchen. The old one was not functional at
all. Building and designing boats was alway much more important than worrying if a stove worked or not. Now when we come in out of
the shed it is a pleasure to work in a new kitchen. We also need a bathroom but that will have to wait I can't be distracted from
the boats right now.
|
Scarab 650
4 May 2012
Have scrapped the idea of building a Scarab 21 at the moment. The idea developed into a whole new design which will take more
time to develop (a trimaran with large cockpit and no cabin to be used as a day-sailer).
I am using the full length foam panels I made for this boat to build a Scarab 650 instead. It is truly wonderful to be at a time
of life when you can change projects and there is no one to complain. |
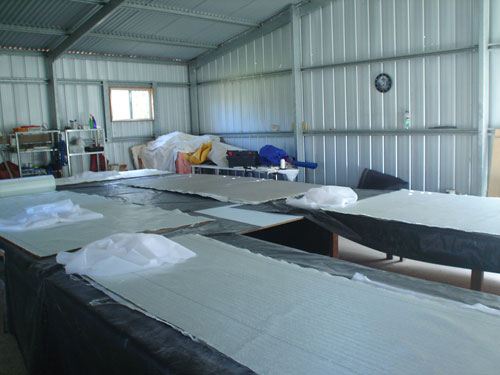
Foam sandwich flat panels
28 April 2012
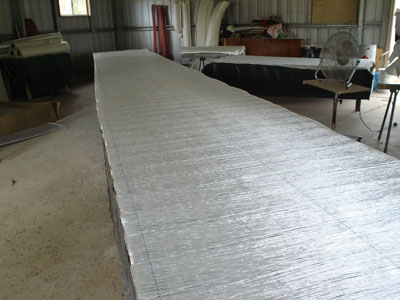
I have just finished building the foam panels for the Scarab 32 main hull. They are cut out and stacked on the back verandah
waiting for us to find space to set up the building frame. We have 3 boats on the go at the moment and space is limited. We are
using Klegecell (Divingcell) foam sheets.
The panels were constructed full length by joining the foam sheets together and covering with glass. This method works well
and calculation of soak coat recommended by the manufacturer of the foam and the theoretical amount of resin needed to laminate
the glass are well within accepted levels.
We use LSE (low styrene emmission) resin and the smell of polyester resin is minimal. So it shouldn't annoy the neighbours.
I have written about foam panel construction a few times so I hope this blog will add something new to the discussion. Building
a foam sandwich flat panel boat is similar to building a boat in plywood. Separate sheets of foam can be laminated, the panels
cut out and then scarfed together by gluing and taping if desired. But if you have the space it is much simpler to join the
foam before it is laminated and the panel cut full length. The panel is smooth so it is easier to fill the boat before painting
and there is no need to use a string line to line up separate sections of the hull panels.
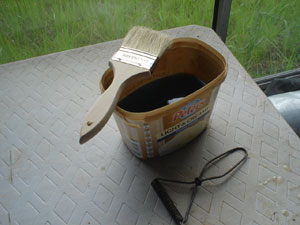
The foam is cut to the desired length and the edges glued. We use resin mixed with aerosil. The foam is held in place with
drywall (gyprock) screws. We place a piece of plastic under the joint to protect the table underneath and prevent our panel
becoming a permanent part of the table. Once the resin sets (usually about 2 hours) the screws are removed. You can fill the
screw holes with filler or leave them to fill with resin as you laminate the foam. If you dont fill the holes the resin will
pass through the holes leaving a blob of resin underneath. This is easy to remove with a small grinder with a sanding disc.
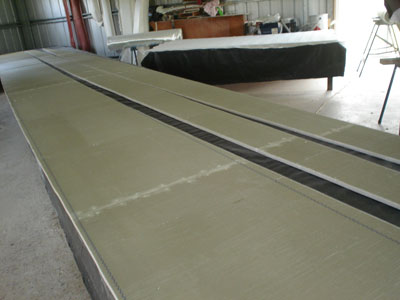
Lay the glass over the length and smooth. Cut peel ply in short lengths (about a metre in the beginning). Mix the resin and pour
it over a section of the foam (about a metre to begin). Allow gravity to help saturate the glass and soak the foam. Using a
metal drywall spatula (10 inch wide works well) spread the resin and work it into the glass. When you are satisfied the glass
is saturated and there are no air bubbles, add the peel ply. Work the peel ply until there are no air bubbles or excess resin.
Sometimes a small amount of resin poured over the peel ply makes it easier to work the air bubbles out. Finish one area then move
on to the next until all the foam is covered with peel ply.
We use inexpensive 3mm plywood to make templates for the hull panels. The plywood has a straight edge which makes it easy to
measure. Once the plywood is cut the pieces are lined up on the laminated sheet using a string line and screwed in place. Simply
draw around the plywood and cut the full length panel. By using plywood templates you can also save on material by fitting
pieces closely together.
The time to build the full length panels is approx. 10% of the total build-time of the hulls but once the panels are cut out they
are very quick to set up on the building frame.
Most of our customers build their boats using plywood but that is beginning to change. I can only think it is the rising price
of plywood and epoxy resin.
We use polyester resin on our boats, partly for the cost and partly for the safety reasons. The Klegecell sheet size we are
currently using is 1220 x 2430 (the size seems to change for each order). On the smaller trimarans (up to the Scarab 650) the cost
of a single finished polyester resin panel (foam, glass, resin and peel ply) is $197 compared to $297 for epoxy. For our larger
boats including the Scarab 32 the cost of a single finished polyester resin panel is $230 compared to $380 for epoxy. This is
a saving of between 30% - 40% on the cost just by switching resin.
All the costs are approx. and in AUD . |
8 April 2012
In line with trying to keep the boat building and plan sales separate I have moved my blog to the building web site. I apologise
to all who have read this stuff before. |
Scarab 21
31 March 2012
Finished laminating all the panels for the Scarab 21 using Klegecell foam, glass and polyester resin. The panels were made full
length by joining the foam before the laminating. Once the panels are made it's the same as building a plywood boat. Around
here the price of epoxy resin has increased to about 6 times the cost of polyester resin. The scarity of plywood and the high cost
of epoxy resin makes building the boat using foam more reasonable. Tomorrow back to making the panels for the Scarab 32. Much longer
panels that have to be cut in place and carried through a side window to be stored on the verandah of the house (the only spare space
left not covered in boat bits. |
Scarab 21
18 march 2012
Progress on the Scarab 32.
All the panels for the floats have been made and Ray has turned them into floats. Three of the beams are finished ready
for installation in the floats. So I am taking a break and working on a project dear to my heart. Building a 21 foot trimaran.
I built floats years ago for a Scarab 22 but the project was postponed. I wanted to build a Scarab 650 but it seemed like a good
idea to use the floats that were taking up room in the shed. Ray altered the design so all the components would work together. Now
I have a project that can be fitted in between the building of the 32 although the 32 footer is still the priority.
If you want to follow the progress see Scarab 21 |
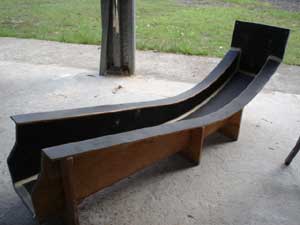
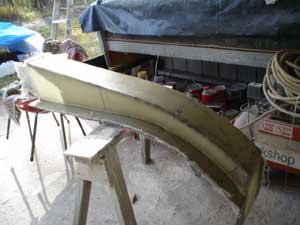
Beams
23 February 2012
It's been a long time since I wrote anything here. You know how it goes when you are having fun. The new boat (Scarab 32) is
growing daily. I've spent all my time making foam panels and beams while Ray is madly joining the bits together.
I have noticed there is some discussion about building the beams for Rays trimarans. Most of his boats have fibreglass
beams with glass laminated in layers with resin. His boats are designed to be built by home builders with a minimum
of extra equipment.
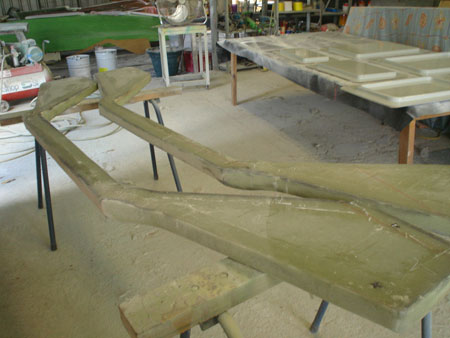
I am presently finishing the beams for the 32 foot trimaran that have the top hat section that are in most of his other designs.
The folding mechanism is housed inside the top hat section and connected to beam stubs extending from the main hull.
I have built 20 of these beams for boats from 18 to 32 and have only used a container to hold the resin, a brush and a
compactor. They are simple but require some patience to finish.
One of the most important things is to start with a strong mould that can last through 4 beams. We have used plywood covered
with resin and form-ply. An easy way to make the fillet around the edge is with plasticene. It is quick clean fillet but it will
have to be re-filleted with each beam (a ring spanner works well to smooth the fillet as the excess plasticine is extruded
through the hole). The last beam mould I used was plywood painted with epoxy primer and Jotun Imperite. It had a smooth shiny
surface and the beam was easy to remove from the mould. The mould is waxed and polished about 5 times initially and once
between mouldings. Its best to use soft wax over plywood but I used hard wax over the painted mould and it worked well.
Cutting the glass is a bit time consuming but it is a job that can be delegated to a willing helper. Scissors will quickly
become blunt when cutting the glass mat so I have found the Bosch cutter a handy tool. It is self sharpening and can be used
for carpet as well.

We have found that there are air bubbles in the surface of the beam, difficult to remove before painting, unless gelcoat or
resin containing filler is used as the first coat.
I use polyester un-waxed (laminating resin) except for the final coat of resin which contains wax. If you use un-waxed
resin laminating can be spread over several days. This gives me time to rest and prevents too much heat building up which will
cause shrinkage and distort the beam. I use a thin CSM (chopped strand mat) layer as the initial layer and that gives a smooth
finish that is ready to paint.
The first beams I built were made with epoxy which was very stressful. It was a large boat and the each beam needed to be
completed in one day. After that stressful time I developed an epoxy allergy and thought my boat building days were over. Since
using polyester Im back on track and enjoying every day building. Although building beams is not my favourite boat
building activity, its not so bad. By using polyester laminating resin the job can be spun out over many days and I use the
activity as a fill in job. Some people insist on using epoxy resin but in Australia it is now about 6 times the cost of polyester
and there are horror stories of people who have developed allergies. I always use a mask and cover up when using polyester but so
far no problems. |